It comes to that time where your brews, your shots, are tasting a little woody, maybe a little hollowness keeps poking its way through. It's time you cleaned out your grinder to remove the stale grinds. Not only for the taste, but the for the essential maintenance of your grinder to keep it at its best for longer.
The guide will also serve as a reference guide for the internal parts of your grinder, what they look like, what they are called and how they function so that you can get to know yours better.
If you lose any parts or require replacement parts after the warranty period, we supply them just get in touch with us!
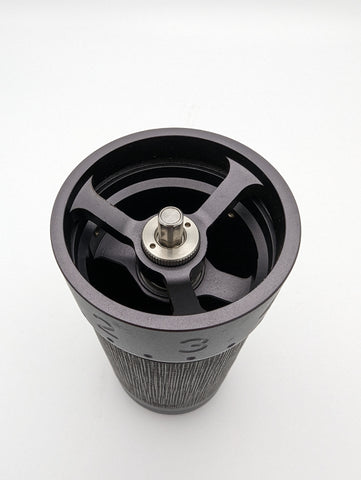
Above: J-Max prior to disassembly
Step 1: Removing the 'Knurled thumb nut'
The Knurled thumb nut is a threaded nut at the top of the central shaft. Its purpose is twofold; 1) to serve as the way the shaft is locked into place so that it cannot fall out of the body, and 2) to serve as a way to calibrate the zero point of the grinder. To remove this, gently press upwards on the burr so as to push the central shaft up slightly. This will loosen the friction between the thumb nut and will stop the burr from freely spinning whilst you loosen it. Loosen the thumb nut by twisting anti-clockwise. Be careful to hold the bottom rotating burr as now the shaft will be loose. Also take note of the orientation of the thumb nut as it has a correct way and incorrect way of screwing back on.
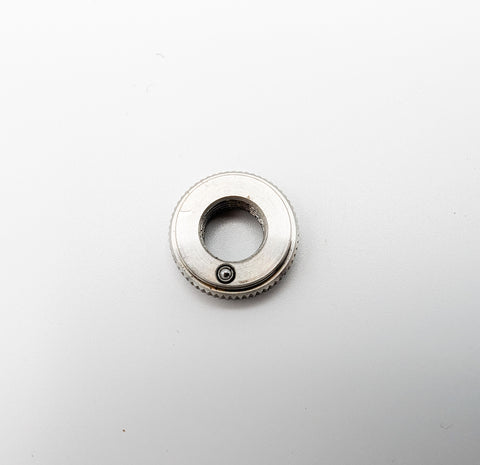
Above: Knurled Thumb Nut, note this is the 'under side' of the nut what faces into the grinder body.
Step 2a: Removing the central shaft/bottom burr assembly
Steps 2a and 2b are coincident as they happen together and can happen in any order, this is just because everything in the grinder at this point is loose. If you chose to remove the central shaft first, allow it to drop out of the bottom of the grinder, or gently encourage it with some pressure from the top of the shaft. Once the shaft is removed, set it aside and move to Step 2b.
Step 2b: Collecting the Top Bearing and Upper Bearing Cap
If you have completed the above, with a cupped hand turn the grinder upside down (bottom burr facing up) and the bearing and upper bearing cap should fall out of the housing found on the top of the grinder where the shaft slides through. If these parts have fallen out during Step 1, just be mindful that the shaft is loose and refer to Step 2a to remove the shaft.
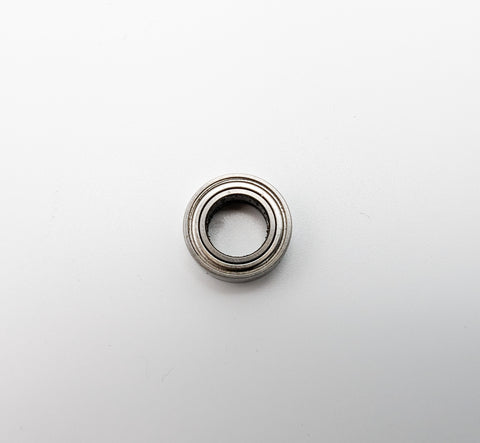
Above: Top Bearing
Below: Upper Bearing Cap (sometimes referred to as the Upper Ring Cap)

Step 3: Removing the Spring and Washer
Self explanatory, they just slide over the shaft. However, note the order they are in and the orientation of the washer which is not symmetrical, there is a lip on one side and not on the other!
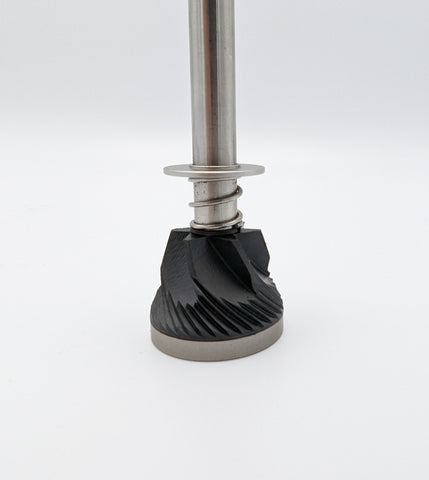
Order of the Spring and Washer, note the lip on the Washer is oriented facing upwards away from the burr.
This is where you can stop and you will be able to clean the grinder 80% of the way. The next step is optional if you would like to remove the outer burr collar which will allow you access the outer burr to clean it easily and more access to the body of the grinder.
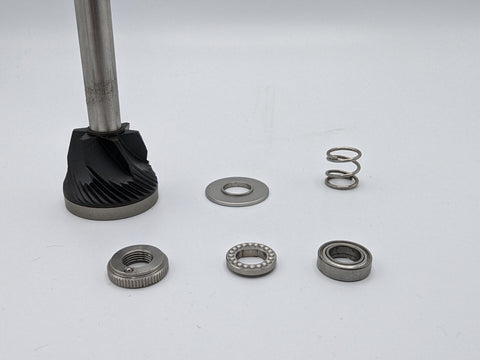
Above: All internal parts exploded. Optional: The burr itself can be removed from the shaft using a hex key, this is unnecessary for cleaning.
Step 4: Removing the Outer Burr Collar
Beware that this requires an amount of force which may require exertion, if you are not prepared to exert yourself I would not suggest going forward. Before we go on, I must mention specifically here that the threads for the outer burr collar to the body are reverse threaded this is not well advertised, it is reverse in the sense that if you look at the outer burr collar with the top of the grinder facing down, the burr collar rotates clockwise to loosen.
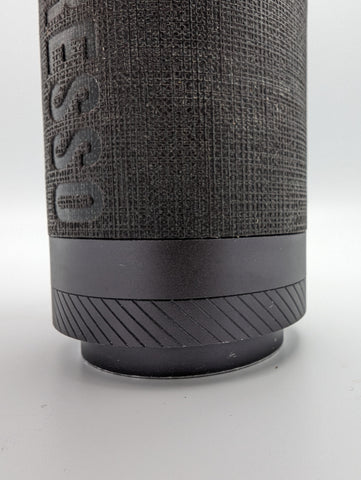
Above: Outer Burr Collar Seam, it is the line just below the textured surface, not the faux seam above the striped area
A suggestion to allow more leverage is to use the rubber grips you were supplied with if you still have them and attach them in over the burr collar, this works wonders and makes it 10x easier to crack the seal. Once it is cracked, unscrew it all the way and you should have the grinder fully disassembled. Note that there may be residual overrun glue residues from the adhesion of the textured surface to the grinder body.
Above: Rubber grips placed over the outer burr collar for added grip, the threads are reverse threaded - clockwise to loosen as you are looking at it here.
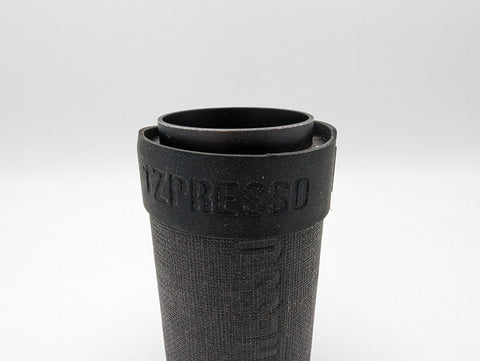
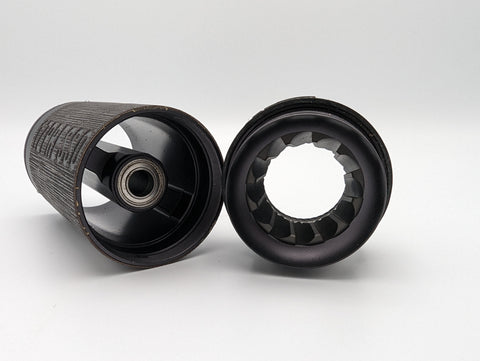
Below: Outer burr collar removed from the body, in the photo here the adjustment ring has also been removed (not mentioned above)
Now that you're as disassembled as you can get, give everything a good clean, knock all the stubborn build up loose with the brush, blow it out with the included blower. Used compressed air if you are lucky to have access to it. Hoover up.
Step 5: Reassembly
Assembly is just the reverse of the steps above. Outer burr collar on, anti-clockwise to tighten and make it fairly tight. Adjustment ring screwed back in (if you removed it, it's optional and dare I say not recommended by the manufacturer, that's why we have left it out here). Reassemble the burr shaft assembly, spring on first then the washer with the lip facing upwards. Then push the assembly up through the central shaft hole.
Grinder upright, place the bearing over the shaft into the housing. Then the upper bearing cap with the multiple holes facing upwards, it also has an orientation with respect to the shaft. Align the flat side of the upper bearing cap hole with the flat part of the shaft, you'll get it when you look closely at them both, the ring cap should then fit snug without being able to rotate about the shaft. Then with some pressure on the bottom burr shaft assembly upwards against the spring resistance, screw the knurled thumb nut into place. The correct orientation shown on the first picture here, the two opposite dots facing upwards. You should feel a few clicks as it is correctly seated. Then you can relieve pressure on the shaft.
At this point the grinder is assembled but not calibrated.
Step 6: Calibration
You may not know this, but the J-Max has a way of keeping track of the rotation number using the triangle grind size indicator. The triangle icon is comprised of dots, 1 at the tip, 2 below, 3 below that and so on. As the adjustment ring screws further down the body, it covers a layer of the triangle allowing you to keep track of what rotation you are on.
To calibrate the grinder is relative straightforward. Rotate the adjustment ring anticlockwise until the triangle is fully exposed. Make sure it's fully exposed such that one rotation finer (clockwise) covers the tip / first dot of the triangle.
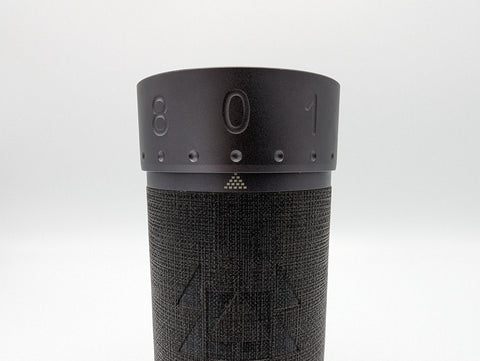
This is what zero should look like, tip of the triangle pointing at zero with five rows of dots visible on the triangle. The top dot has no space between it and the ring.
If you are finding that you can't twist the ring any further anticlockwise because it locks out (ring lock), push the burr shaft assembly upwards against the spring resistance as much as you can until the burrs touch. With the pressure still on the burr shaft until burr touch, twist the ring anticlockwise until you reach zero with the triangle fully exposed. If the ring still locks, loosen the thumb nut to allow the ring to be adjusted further anticlockwise. Then once you have the desired position shown above, tighten the thumb nut as tight as you can. Then release the pressure on the burr shaft. What we have done here is set the ring lock at burr touch. The grinder is now calibrated.
To explain the thumb nut a bit more, essentially its position in the tightening / loosening cycle sets the ring lock, it sets exactly how far the ring can be unscrewed anticlockwise (finer settings) before it reaches the thumb nut and therefore stops it from rotating further.
Now you have a fully cleaned, maintained and calibrated J-Max!